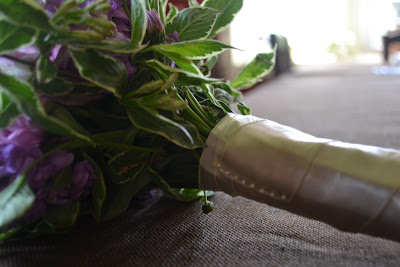
$50 seems to be the minimum going price for a hand held prom bouquet these days. CRAZY! My son gave me permission (with an okay from his date) to give it a go at making one here at home for his junior prom tonight.
I rushed off to Trader Joe's at 8:30am this morning to make sure I got first pick at the day's flowers.
The dress is a purple/lavender color so I went with purples and whites with some greenery picked from around my yard.
Here is the selection of stuff I came home with from the store for about $15.
To decorate the outside of the hand held part, I picked up a few things at JoAnns in the clearance section - most of which I didn't end up using. The floral tape which sticks to itself as it wraps is a MUST HAVE for this project. I got it for $1. The items I didn't use cost $1.50.
I may still use the lavender ribbon around the outside.
I also scrounged around the house and in the sewing drawer (which contains 40 year old products handed down from my grandmother).
I did iron and use a piece of wide satin ribbon which can be seen at the very bottom of the photo above.
Next I cut off the pricky things and excess greenery and anything that didn't look fresh and healthy from my flowers. I made piles of the cleaned stems. And got to work - mind you I was really nervous that I wouldn't be able to do this.
As you add stems to the bunch in your hand, you kind of let the stem fall to the opposite side of where you placed the flower head. You end up with a big bunch in your hand having added them one by one around the bouquet, making sure they are even and well placed. It looks like this.
Then came the floral tape and I breathed a sigh of relief as I was able to loose my tight grip on the bundle and give it over to the security of the tape. I wrapped all the way down to the bottom and then back up to the top.
Above is the wrap job with the stems still long.
Next, cut the stems to an even and shorter length - with something really sharp. This was harder to do then I anticipated.
I then wrapped the satin ribbon from top to bottom and back up to the top. I turned under the ribbon edge and used white headed applique pins - the only appropriate pins I had here at the house. You can purchase white headed floral pins that are longer and probably better, but these seemed to work fine and hold well. I went thru the tape AND into some of the stems for security - hopefully this will be okay.
And ta da! The bouquet is pretty much done. As I said above, I am pending a decision to add a lavendar bow or bows. Feel free to offer your opinion on the bow.
Here are some more shots of the finished bouquet. I placed it in a sturdy vase that wouldn't crush the flowers and put a scant bit of water in the bottom to keep the stems hydrated. I removed a shelf from our extra fridge so there was room for it to stand in the vase without touching anything and gave it a final spritz of water on the blooms to keep it fresh. I hope this will work and by 6pm tonight it will still look good!
Ah - now to breathe a sigh of relief! Enjoy!


1 comment:
This prom bouquet is simply looking gorgeous and easy to make. The cost of making it is too affordable too. Hired BloomThat Flower Delivery services for my wedding bouquet but now thinking to make one myself to surprise my fiancé and guests.
Post a Comment