

So the other day, I was scrounging around in our "art room," (a room in the house that has evolved from being a kid's art room and then changed to a music and recording studio for my teenagers and then changed to a bit of a storage area) and I came across this:

I'm not sure where it came from. I don't plan to make friendship bracelets with it right now so I wondered if I could use it to do something CROCHET...
It's kind of like embroidery floss but thicker and less "splitty." It comes with TWO EACH of every color you see pictured.

I thought it might be cotton but it's not - as you can see it's wool and viscose. Each tiny skein is just 3.28 yards. That's not much. The photo on the top left - the green squiggle there - well that's an entire skein!
so... I figured I'd have to get kind of creative with anything crochet. I sat down and created a little tiny star/flower motif... I joined them together and created a stained glass coaster.
The first one I created looked like this:

And I wanted to re-create it and photograph the steps for a tutorial and now I have.
I sat here today and worked it all out for you.

And now I will present the step-by-step photo tutorial for the stained glass coaster. (Amer. crochet terms)

Make a magic (adjustable) ring.

chain 1, 8 sc in ring
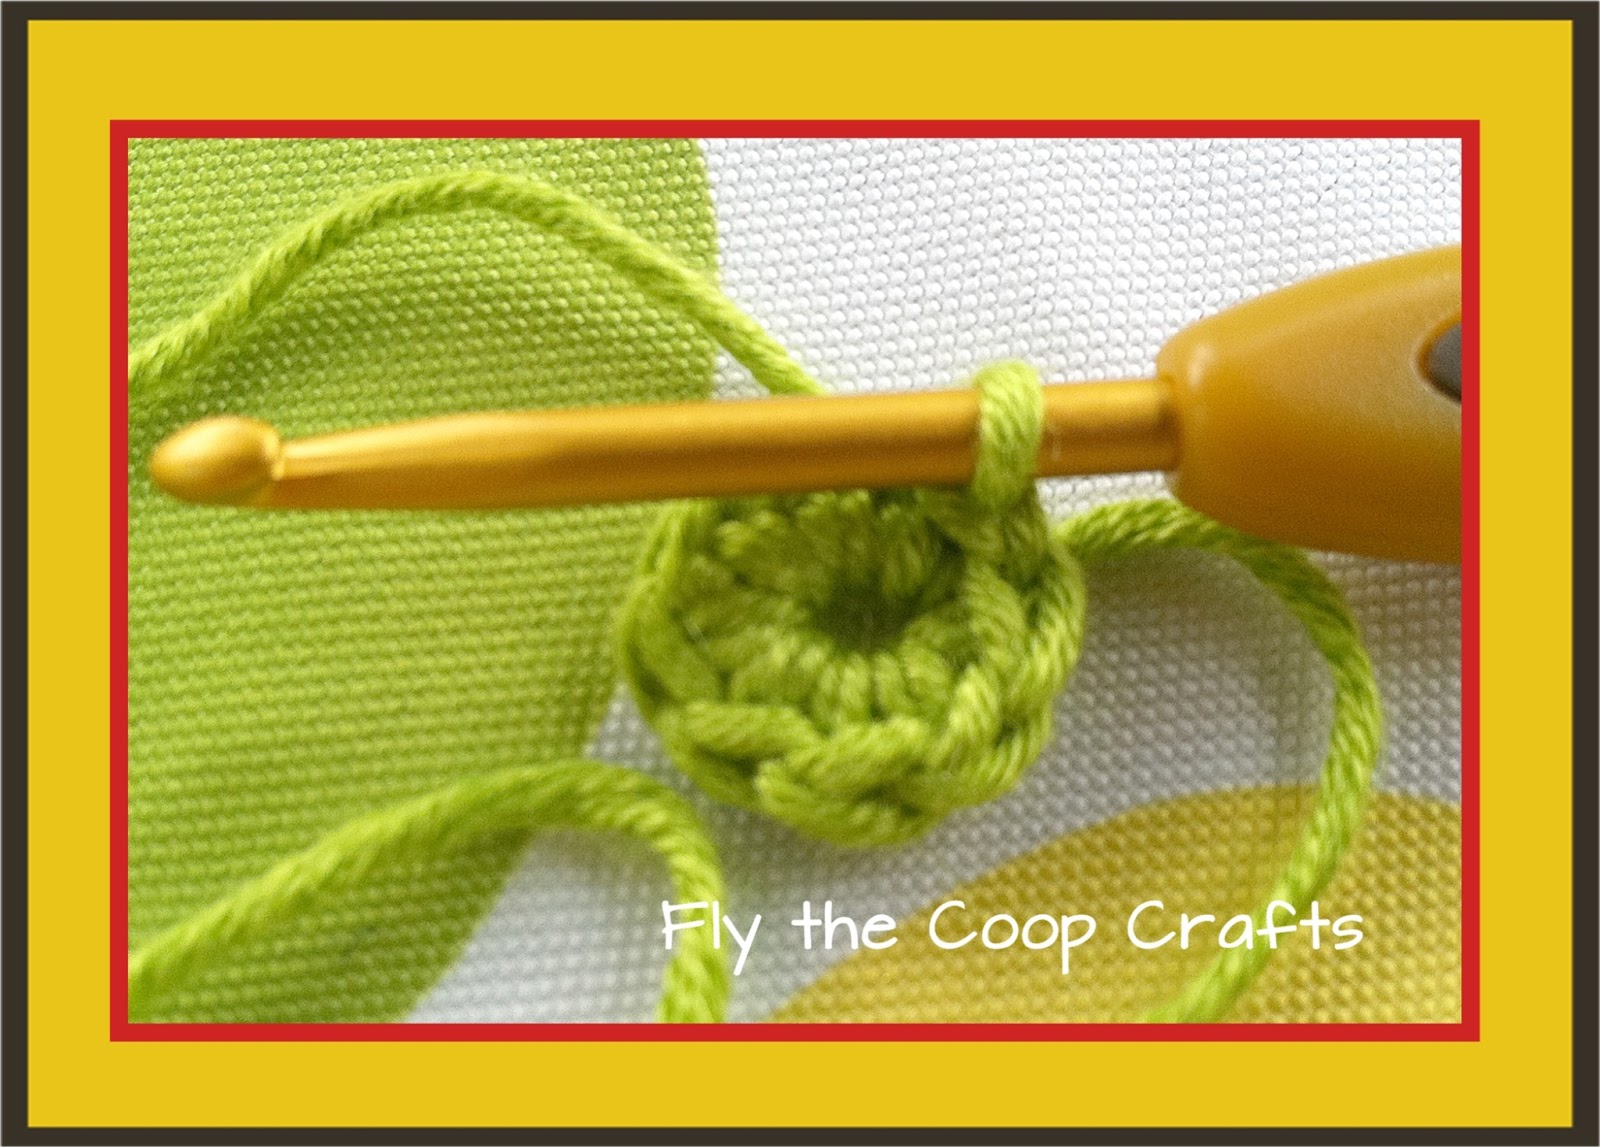
Pull ring to tighten and join with a slip stitch. Round 1 complete.

ch2, then sc in same stitch as join (ex 1)
*Skip the next stitch (see ex 2). Then (sc, ch2, sc) in next stitch. Repeat from * 3 more times, then sl st to join the round.

You now have a bit of a square (sorry for the blurry photos - I was outside with an camera phone). Round 2 is now complete.

Perform the following stitches in the first ch2 space from the previous round: sc, dc, tr, dc, sc. That completes your first corner petal.

Now, you are going to "dip down" to the skipped stitch from the second round and slip stitch in there.
That kind of defines a stronger petal shape.
*Into the next ch2 space (sc, dc, tr, dc, sc), then sl st into the skipped st from round 2, repeat from * 2 more times. Finish off.

Ta dah! You have now completed ONE little star petal motif. Pull the center string to tighten the middle and weave in the ends (if you are good you will weave in NOW) - often I'm lazy and wait to the end. But it's easier to go on without little tails hanging about.
Next, grab another color and you will start right in on a second motif.
Complete Rounds 1 and 2 with the second color (pink in the example). When you get to round 3, complete ONE petal (petal = sc, dc, tr, dc, sc) and one dip down slip stitch.
Then, complete the first half of the next petal (sc, dc, tr). This is where you will make the join to the first motif. Joining the green and pink motifs will require a join to the top of TWO petals. I do the join on the second and third petals. To make the join, I follow the basic procedure used by Lucy at Attic24 in her "join as you go method." Basically - my method is the same concept. Keep in mind that each joining stitch in this coaster pattern uses a slip stitch as the joining stitch.

So as seen in example 1 above, I have made 1.5 petals on the pink motif. In example 2, I put the hook through the two loops at the top of the tr-stitch on the green petal. Yarn over with the pink and pull it through the green and pink loops.
In example 3 I have completed my first join and I have continued on to finish the rest of the petal by making a (dc, sc) in the same chain2 space.
Now, slip stitch into the skipped stitch from round 2. Then make another half of a petal (sc, dc, tr), then make the second join with the green motif (see example 4) finish off the third petal by making a (dc, sc) in that same chain2 space.
Slip stitch in the next skipped stitch from round 2, complete one more petal (sc, dc, tr, dc, sc) - no joining needed on this one and TA DAH! Example 5 shows two happily joined star petal flowers.
I hope that makes sense. Please feel free to contact me if you need further explanation.
Let's continue on.

The top left photo (above) shows THREE little motifs joined in a row. When you get to motif to the second "row" of motifs you will need to join each motif at THREE of its four petals points rather than just at two.
When I join three sides, I like to make 1/2 a petal, join, then complete the petal. Slip stitch (dip down), complete 1/2 of the next petal, join a second time (this time I join by going BETWEEN the joined space of the two motifs), then complete that petal. Dip down slip stitch, then make 1/2 a petal. Join one last time, complete the third petal, slip stitch and make a complete fourth petal all on it's own with no joining.
Remember a full petal is (sc, dc, tr, dc, sc) and a Joined petal is (sc, dc, tr, join, dc, sc).
Again, it's the same concept that Lucy describes in her join as you go method. My joins are always done with a slip stitch for this project. She clearly shows how to join on two sides and how to join on three sides. She joins granny squares but the concept is very much the same. My motif has only 4 corners, and no sides, so there are fewer places it needs to be joined.
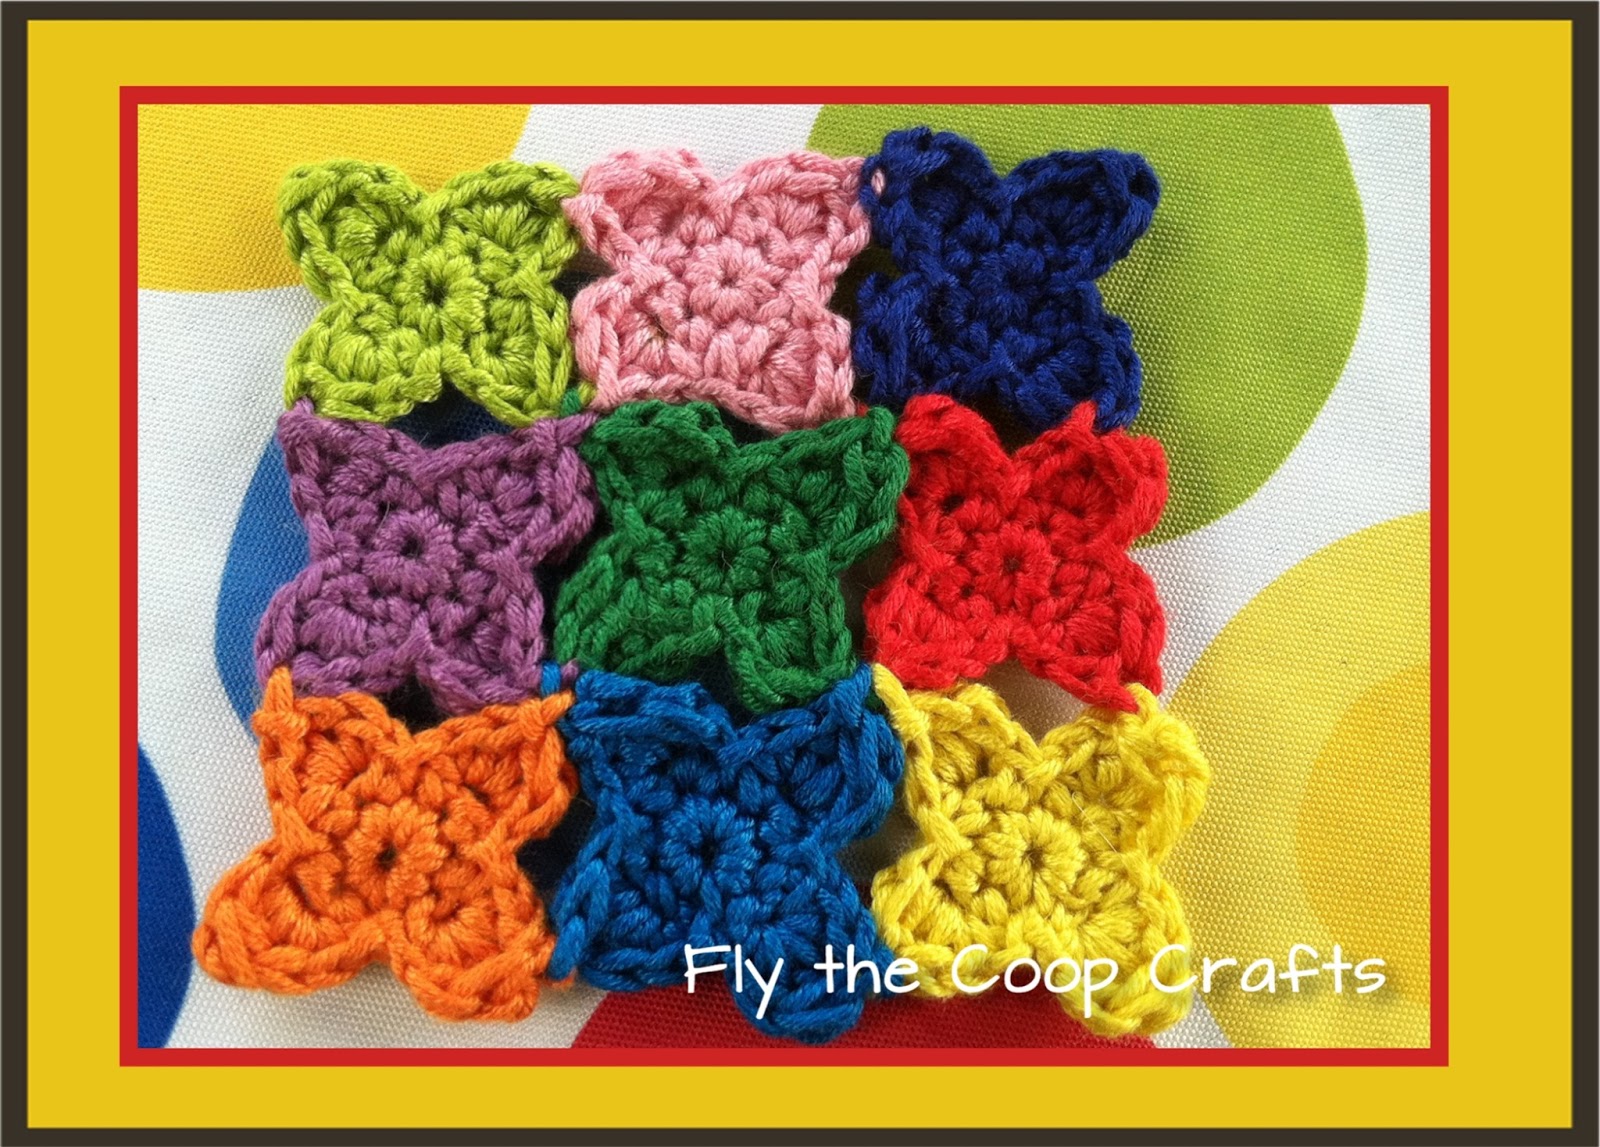
Make and join three more motifs until there are a total of nine! Voila! There you have it. A rainbow of tiny little star petal motifs all joined up together - three rows of three, a very nicely formed little square.
I decided that the motifs reminded me a bit of a stained glass window. That's when I realized I wanted a border around the outside edge. I came up with a really simple border - enough to just hold the square together and make it straighten out a bit.
Here's how.
Join a black yarn in any corner. 5sc in that corner. *ch2. dc into the same "dip down slip stitch" as in round 3 of the motif. ch2. dc over the join between the motifs. ch 2. dc, in the dip down slip stitch, ch 2, dc in the join, ch 2, dc in the dip down, ch2, 5sc in next corner. Repeat from * 2 more times. Now 3 sides of your square have a border. On the last side, follow the same pattern, but when you get back around to the first corner join the first sc (of the 5sc) with a sl st to close the round. Finish off and weave in all ends and clip them.
Easy, right?
And here's how that looks:

I love the way it seems like the flower motifs are floating inside the border, so unobtrusive!
Love it - and look how well it looks underneath of my icy cold water. By the way - the icy cold water was a MUST HAVE for crocheting outside today cuz it was H-O-T and H-U-M-I-D today in my corner of the world. YUCK.
Feel free to share photos of your stained glass coaster on my facebook page if you make one!
Ta ta for now - Sher