Showing posts with label Spring. Show all posts
Wednesday, April 17, 2013
Flowers & Flutterbys Crochet Wreath
TA-DAH! It's done. AND...I love it!!!
Wanna make one? Well here's how. By the way, if you missed my preview of this wreath, see that POST HERE.
First, we'll start with the wreath itself. Since this wreath is one of several in a series that I've designed, I used the same pattern for the wreath. Click here for the wreath pattern. For the Flowers & Flutterbys wreath I used 2 colors of yarn (Bamboo Ewe) for the stripes and a brighter green of the same yarn to stitch the two wreath sides together (the inner and outer join). I used a size F hook to make the wreath dense and firm.
After making two sides of the wreath (identical), I joined the two sides at their inner ring. I added the motifs to the front wreath side only. I used the tails from the motifs to stitch them onto the front side. The beauty of the two wreath sides is being able to just stuff all the ends between, not having to weave them in - thank heavens!
This wreath included 4 daffodils. I didn't design the daffodil pattern. I found it HERE. I did a few things different. ONE, I didn't use a pipe cleaner OR make a stem. TWO, I added a separate flower middle. The pattern for the daffodil middle is (make a magic ring, ch 2, work 8hdc into ring, tighten ring, join to first stich with sl st. Finish off).
To keep the daffodils in a bit of a cup shape, I sat each one in a small glass dish, spritzed it well with a bottle of Stiffen Quik and put them in the microwave to firm up according to the directions on the bottle. I did each one twice and they have held their cup-like shape.
There are also 11 Sweet Sevens (I designed a new pattern for the Sweet Seven Flower) you can find the photo tutorial for the sweet sevens HERE and also on my Ravelry site.
Finally, I've designed a lovely new motif called Flutterby Butterfly! I searched and searched for a butterfly pattern that looked just the way I envisioned but even with all the creations, none of them were what I was wanting. So... after a long bit of trial and error, I designed my own. I'm very happy with it. I've made oodles of them now and they are quite easy. I've prepared a step by step photo tutorial for the little sweeties and you can get the Flutterby Butterfly tutorial by clicking HERE.
There are FOUR Flutterbys on the F&F wreath. All are made with cotlin dk. Three of the four are made with an E sized hook and one was made with an F sized hook.
Once the motifs are made and stitched together, the outer ring of the wreath sides can be joined.
Usually, I just cut apart an old cereal box to form a cardboard ring and slip it between the two wreath layers but I had already emptied the recycle bin and it had rained and I didn't fancy a soggy brown board living inside the wreath. So, I hunted around in my sewing room and found this stuff:
It's made to be insulation in window cracks and such. I had purchased a bag of it at a hardware store going out of business figuring I'd do something crafty with it and now I have.
I also snagged a broken hanger which I re-shaped into somewhat of a circle and taped the insulation ring to the hanger circle. To assure that the inner ring of the wreath also held it's form, I made a smaller foam ring and simply stuck it between the layers after the inner ring sides had been joined.
As I joined the outer rings (I used sc and I go through BOTH loops of each wreath side - 4 loops - on every sc), I realized I could crochet up the hanger hook and cover the wire. I did finish off and re-join my yarn after covering the hanger hook.
The new solution worked fine, but it was a bit of a hassle to create and I'm not sure I'd do it the exact same way again - however, this time, it is in - and done, and it worked, so alls well there.
If you haven't seen the other wreaths in my series, you can check them out here (and also on ravelry):
Autumn Wreath
Christmas Wreath and also HERE
Double Sided Winter/LOVE Wreath
For now, I am enjoying a pastel Flowers & Flutterbys wreath in time for all the spring colors outdoor to begin popping up and also in time to enjoy for Mother's Day!
Flutterby Butterfly - a crochet photo tutorial
Did you see my Flowers & Flutterbys Crochet Wreath? Click HERE and HERE for that post.
Well, the Flutterby Butterfly was designed as a special motif just for that project, but it's so cute, I'm sure there are many places a crochet butterfly motif would be perfect.
So - here begins a step by step photo tutorial that you can follow to make your own Flutterbys!
Here's how it looks close up on the F&F wreath.
You can find THIS tutorial and others also on my ravelry design page.
Well, the Flutterby Butterfly was designed as a special motif just for that project, but it's so cute, I'm sure there are many places a crochet butterfly motif would be perfect.
So - here begins a step by step photo tutorial that you can follow to make your own Flutterbys!
Here's how it looks close up on the F&F wreath.
You can find THIS tutorial and others also on my ravelry design page.
Monday, April 15, 2013
Perfectly Pastel: Crochet Wreath Coming Soon...
I've been inspired by these:
Pastel flowers and whites! Soft, whisper colors. Not typical for me - I usually like brights and browns and big, big color. But lately I've found inspiration from the palest of spring flowers.
I was also inspired by this:
A sweet little teal towel that my mom sent me as a gift. It's so pretty and white and full of soft lovely herbs. I haven't been able to bring myself to use it for drying off the dishes. It's just been hanging in the kitchen looking lovely. And see that little butterfly in the upper left hand corner - well that little guy was the inspiration for a whole new pattern (coming soon too)!
With all this inspiration, I headed off to audition the yarn stash for a part in a new wreath -
And I gathered a soft palette of dks and worsteds, mostly cottons.
I added a few of these (CLICK HERE FOR FREE PATTERN).
And after a few weeks of pattern making, designing, hooking, stitching, and weaving in the ends, they are all coming together for their big debut.
The wreath is done and all the patterns are up - tutorials made etc... Go HERE to see the final wreath post. Go HERE to see the butterfly tutorial.
Pastel flowers and whites! Soft, whisper colors. Not typical for me - I usually like brights and browns and big, big color. But lately I've found inspiration from the palest of spring flowers.
I was also inspired by this:
A sweet little teal towel that my mom sent me as a gift. It's so pretty and white and full of soft lovely herbs. I haven't been able to bring myself to use it for drying off the dishes. It's just been hanging in the kitchen looking lovely. And see that little butterfly in the upper left hand corner - well that little guy was the inspiration for a whole new pattern (coming soon too)!
With all this inspiration, I headed off to audition the yarn stash for a part in a new wreath -
And I gathered a soft palette of dks and worsteds, mostly cottons.
I added a few of these (CLICK HERE FOR FREE PATTERN).
And after a few weeks of pattern making, designing, hooking, stitching, and weaving in the ends, they are all coming together for their big debut.
The wreath is done and all the patterns are up - tutorials made etc... Go HERE to see the final wreath post. Go HERE to see the butterfly tutorial.
Thursday, July 19, 2012
Skinny Spring Scarf Crochet Pattern
I've been designing a lot of my own crochet patterns.
Slowly but surely I've been writing up the patterns, creating pdfs of the patterns, adding them to my Ravelry FREE pattern store, photographing the items I make, etc...
The first one I've totally completed is the Skinny Spring Scarf. What do I love about this pattern? WELL... it's fast, easy and super inexpensive to make. It's also a breeze to crochet so I can make them in a multitude of colors. It's airy enough to wear in the spring even in semi-warm temperatures.
SO...what's not to love! AND... all my patterns are offered for FREE.
Here is the link to the pdf download of the pattern on Ravelry.
Below is a photo of the pdf file so you can see what you'll be getting.
Please don't ever sell my patterns. You are welcome to share my patterns by printing the pdf, sharing the pdf or linking to my blog. If you make the pattern youself, please photograph it and share it with me - I'd LOVE to see it!
Look for a lot more original crochet patterns to be coming in the next weeks and months.
Slowly but surely I've been writing up the patterns, creating pdfs of the patterns, adding them to my Ravelry FREE pattern store, photographing the items I make, etc...
The first one I've totally completed is the Skinny Spring Scarf. What do I love about this pattern? WELL... it's fast, easy and super inexpensive to make. It's also a breeze to crochet so I can make them in a multitude of colors. It's airy enough to wear in the spring even in semi-warm temperatures.
SO...what's not to love! AND... all my patterns are offered for FREE.
Here is the link to the pdf download of the pattern on Ravelry.
Below is a photo of the pdf file so you can see what you'll be getting.
Please don't ever sell my patterns. You are welcome to share my patterns by printing the pdf, sharing the pdf or linking to my blog. If you make the pattern youself, please photograph it and share it with me - I'd LOVE to see it!
Look for a lot more original crochet patterns to be coming in the next weeks and months.
Monday, March 26, 2012
Springy Flower Wreath in Crochet
I was REALLY tired of the fake flower forsythia wreath from the JoAnns clearance sale going up on my front door every spring.
I wanted something handmade.
I started looking around on my favorite blogs, and checking out Pinterest to see what inspiration I could find.
These two ideas struck me:
This first one is from Lucy at Attic24. Hands down my favorite UK Crochet gal. I loved everything about her sweet little wreath EXCEPT the size. Not that a 6" wreath wasn't perfect for where she hung it, but my front door required something bigger.
This other one is from an unknown source. I found it on pinterest and did my best to trace it back to its original source with no luck (I am not a fan of unsourced pinterest photos). I apologize in advance to its original creator and would LOVE to offer credit for the beautiful design.
One thing I liked about this second wreath is all the different flowers. However, the pastel colors wouldn't look as good on my front door and I didn't really want to add any leaves. I liked the way Lucy's wreath showed some of the actual wreath as well.
So, I went to work adapting a larger wreath using Lucy's FREELY SHARED (Thanks Lucy!) pattern from her blog.
To make my larger wreath, I used 3 colors of I Love This Yarn that I bought online from Hobby Lobby. I wanted to use cotton but I didn't have any appropriate weight cotton yarn that had the vibrant colors I was looking for. So, I went with this acrylic. After a bit of trial and error, here is the pattern that I used to create the larger sized wreath base. My wreath measures about 13" in its finished size after the front and back of the wreath have been stitched together.
All instructions are in American Crochet terminology.
To make ONE SIDE of the wreath, crochet 96 chains. Then, dc (in the 3rd chain from the hook). dc in the next 5 stitches. 2dc in the next stitch. *dc in the next 6 stitches, 2 dc in the next stitch, repeat from * to the end of the row of chains. You will notice that you can now form a soft circle with your strand of crochet as the 2dc in the same stitch make it turn slightly circular. Slip stitch to join the strand into a circle. I then also threaded the tail onto a big needle and wove the end in so that both the top and the bottom of the dc row were smoothly attached into a circle. For my wreath, I changed colors at this point to continue, but you don't have to.
Chain 3 (after joining new color if you're changing colors) which counts as a dc. dc in the next 9 stitches, 2 dc in next stitch, *dc in next 10 stitches, 2 dc in next stitch, continue from * to end of circle. Join new color here or continue in same color.
Chain 3, dc in the next 15 stitches, 2 dc. *dc in the next 16 stitches, 2 dc in the next stitch. Repeat from * to end. Join new color here or continue in same color.
Chain 3, dc in the next 19 stitches, 2 dc. *dc in the next 20 stitches, 2 dc int he next stitch. Repeat from * to end. Join new color here or continue in same color.
Chain 3, dc in the next 23 stitches, 2 dc. *dc in the next 24 stitches, 2 dc in the next stitch. Repeat from * to end. Slip stitch to finish the front of wreath.
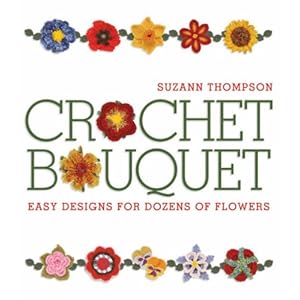
To create the flowers, I played around in 3 crochet books and experimented with different flowers. I made all the flowers using a worsted weight of cotton yarn. I used a combination of I Love This Cotton from Hobby Lobby, Lion Brand cotton yarn and Sugar and Cream yarn by Lily. I combined several big flowers with several small flowers to create some double and triple decker flowers. I cannot reprint the patterns for the flowers I made specifically because I got them from books and don't want to infringe on those copyrights. Here are the books that I used.
I bought mine on Amazon but my local library does carry two of the three, so check out your library to test drive them first.
I also checked my pinterest board called Crochet Lovlies Motifs which is loaded with fabulous flower motifs attached to patterns from crochet bloggers and craft sites. Check out that pinterest board by clicking HERE.
Once your wreath front and flowers are complete, lay the flowers out on your wreath front and arrange them the way you like them. I used T-pins to hold the flowers in place. I used pearl cotton to attach them to the front of the wreath and knotted them in the back to remain in place.
You may need to block or flatten or iron (press with steam only if using cotton) your flowers before you attach them. Mine seemed to lay reasonably flat, so I didn't.
Create a wreath back the same way you made the front. Weave in the ends of both the front and back of your wreath pieces.
Next, go to your recycling bin and look for a piece of cardboard. I used a cereal box. Cut a donut shape from your cereal box. I traced around my wreath front with my pencil pointing inward so the cardboard donut was a bit smaller than the wreath.
At this point, put your two wreath sides with wrong sides together and the cardboard donut in between and use a sc to "stitch" together the two sides. I started with the outside circle of the wreath but think it might have been easier to start with the inside. I also added an additional row of sc to the inside circle when stitching together but that's just because I liked the look.
I crocheted a row of about 20 chains. Then, I sc in each chain and attached that to the top of my wreath as a hanging loop. You could probably incorporate the hanging loop into your row of sc joining stitches, but I sort of forgot that detail until I'd crocheted it all together.
In addition to a cardboard structure on the inside, you could use a piece of circular foam, a coat hanger or even some stuffing depending on the look you want to achieve with your wreath.
I hope my instructions were clear and if you DO make a wreath inspired by my creation, feel free to share it on my FB Page by clicking here and uploading your photo!
Happy Hooking, Sher
PS - apparently, the dog was much less impressed my wreath than the she was with the squirrel that was on the front porch!
Subscribe to:
Posts (Atom)