

Last year, I looked all over blogland and pinterest in hopes of finding a crochet poinsettia tutorial. But, although I did find some pretty ones, I just couldn't find the one that I pictured in my head. I did find ONE pattern that looked something like what I was envisioning but the pattern required me to make MANY many parts and then hook them all together (like over 15 parts ugh). I wanted something simpler and with fewer parts. The pattern I came up with has three parts. The red part is the poinsettia bloom. The green part is the poinsettia greenery and the white part is the poinsettia middle. I borrowed the pattern for the middle from another blog. The red and the green part I created myself.
The parts can be made in any order. For this tutorial, I'm starting with the red part (the flower). You are welcome to experiment with colors of course. I have seen poinsettias in a variety of colors. They bloom in all shades of red, pink and white!

Round 1: Into your ring ch1. Make *2sc then ch2. Repeat from * five more times. After the last ch2, join with a slip stitch to close the round. If you have used a magic ring, pull the tail to close.
The photo above shows the magic ring start for round 1. The bumps are the ch2 spaces.

Round 2: into the first ch2 space, *work the following stitches (sc, dc, tr, picot3, tr, dc, sc)**. One petal made. Work the instruction from * to ** into every ch2 space. (6 petals total for the round). Join round with slip stitch. Finish off.


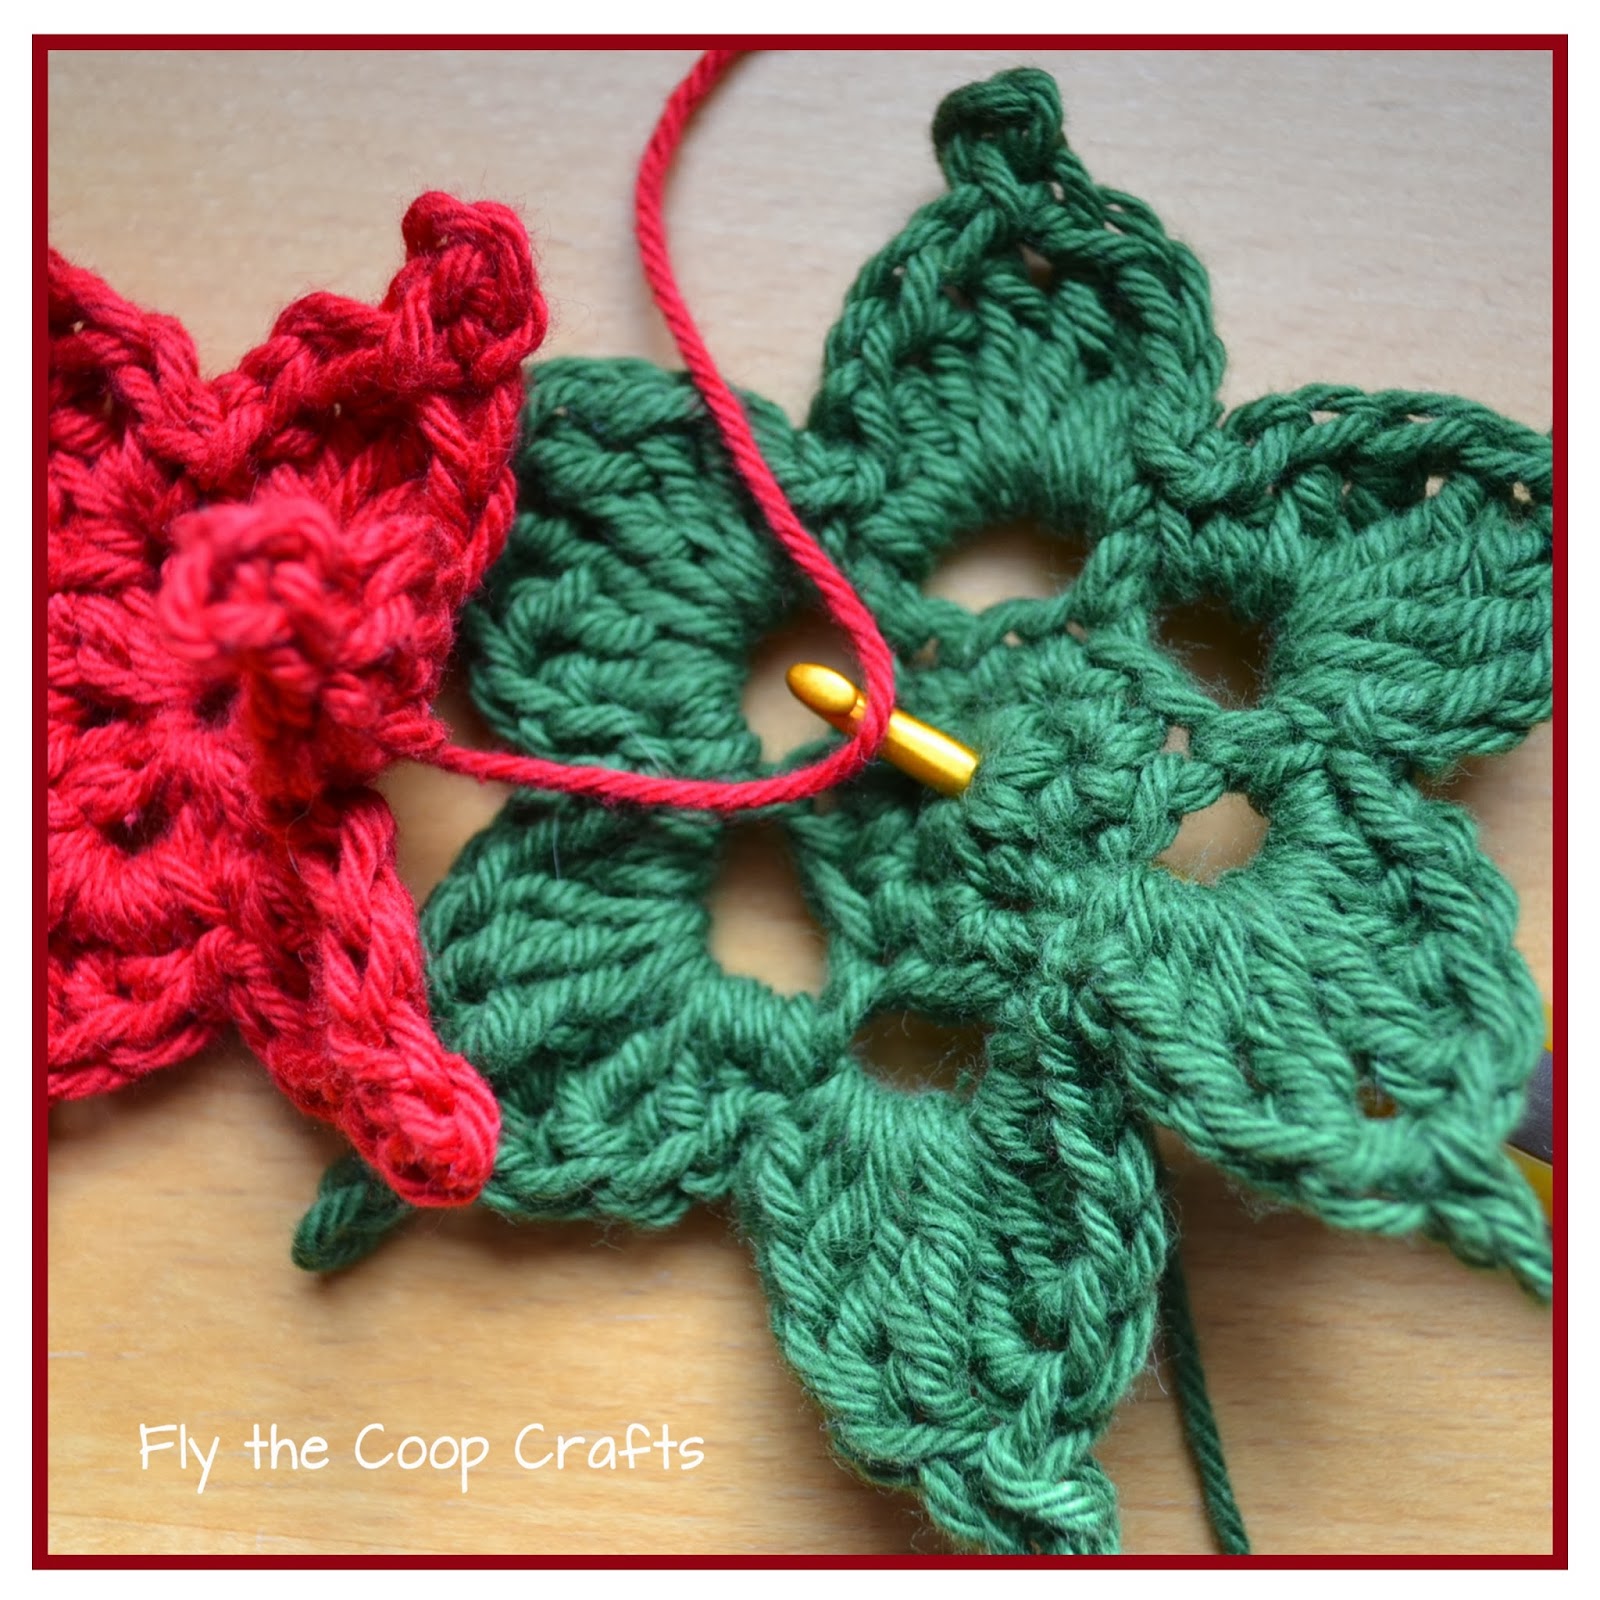
Next. Let's make the green leafy part of the flower.

To begin the leaf part either make a magic ring or ch 3 (or 4) and join with a slip stitch.
Round 1: ch1, make 6sc into the ring. If you used the magic ring, pull the tail to close.


Work these stitches into every chain3 space in the round (sc, hdc, dc, 2tr, picot3, 2tr, dc, hdc, sc).
Slip stitch to join the round and finish off. Poinsetta leaf part done!

Upon assembly, the red flower petals will sit atop the green leaf petals like this:

Go HERE TO SEE THE CROCHET BALL PATTERN.
Here is a photo of the little balls from Lucy's blog:
When you visit her blog post, look for this photo of the little balls. You will find her written pattern explanation of how to make them right below the photo. While you're over at Attic24, look around a bit. Lucy has many, many lovely patterns and beautiful photos and stories about crochet.

I plan to use one or maybe two of my poinsettias as gifts and will make them into brooches. I already have birthday gift plans for the brooch (tho. I should have already completed and mailed the gift before today)! Better late than never I suppose.


I used this carpet warp cotton. You can read all about my carpet warp yarn on this post.

I am feeling a bit of a holiday tug with my crochet. I still have lots of autumn and Thanksgiving ideas I'd like to create, but I feel like the holidays are already looming. Though it's been cold here, I've managed to do without the heat as of yet. I've been piling on extra layers in the house and drinking warm beverages to compensate. We just had the chimney cleaned out, so we are ready for the fireplace!
Hope you enjoyed my poinsettia tutorial. Let me know if you make any of your own.

I may put a pdf download of this pattern on Ravelry - but that will have to wait for another day... too much work (real work) to do today!!!
Enjoy - Sher
20 comments:
Thanks for the pattern.Really easy to follow.I am making them for on my Xmas wreath.
This was a great pattern and I really appreciated the pictures to follow along with. It's simple, pretty and I'm planning on making several into hair pins (with a bobby pin?) for favours in homemade Christmas crackers. Thanks so much!
Awesome tutorial! thank you for this! I also see snowflakes in the pattern and I have been looking for a pattern to make some coasters and I am thinking the leaves will do just fine for that project! This is my first time here but I will be back! If you want to visit me I am at http://brendasbric-a-brac.blogspot.com/
tahnk you very much!!!!. It's a lovely tutorial!!!
Thanks for the tutorial!! I was trying to find a nice pointy-ended flower petal this morning, and this one does quite well. Thank you!!
Featured you here, on my blog: http://kotascrochetcreations.blogspot.com/2013/12/on-seventeenth-day-of-christmas.html
(Sorry this notice is a bit late, but I forgot to let you know!)
The only patterns I've been able to find for poinsettas that actually look like poinsettias are knit ones, so thank you for this.
Very thankful you posted this. I also could not find a pointsetta I was happy with. Yours is perfect. Thank you for the awesome tutorial!
Hello Sher,
Found your site this morning while looking for a poinsettia pattern to crochet. Thank you so much for the great tutorial pattern, it is perfect.
Also, I was thrilled to read about 8/4 carpet warp. I have crocheted as long as I can remember and I had never heard of this weight.
It sounds just perfect for some projects I want to try.
Will be ordering some later today probably from the Camilla Valley Farm site.
So sorry about your experience with the Maysville brand not being colorfast.
Hope you have a very Merry Christmas and a blessed New Year.
Anna
Thank you soo much for this; much easier than making petals to sew together later :); will be making lots!!! Christmas is just around the corner,
Love your poinsettia! It was the perfect topper i was searching for to finish off my Chrismas hand/fingertip towels. Thanks so much ☺
Love your poinsettia! It was the perfect topper i was searching for to finish off my Chrismas hand/fingertip towels. Thanks so much ☺
I would do five yellow knots in the center. Looks more like the real thing.
Thank you! I was looking for a poinsettia-style embellishment for a Christmas hat, and this was the perfect starting point. I adapted it a bit by making the larger flower first, and then using the skipped chains to make the petals of the smaller flower, instead of making a separate layer and joining them. It worked out very nicely indeed.
Thank you thank you thank you! I also found the one with 15 parts and I was displeased with the outcome. Yours is perfect! You can see it here <3 https://www.instagram.com/p/BqbA1khnxf-/?utm_source=ig_share_sheet&igshid=14t3pm7ipsqxy
I am definitely going to try your pictorial for a poinsettia! Tomorrow!
This can be a very complicated little ornament to make but yours is so clear that I think it will be much easier!
Thank you so much!
Nina
Están hermosas alguien de aquí me ayuda con la traducción de los puntos porfavor por ejemplo:dc, 2tr, picot3, 2tr, dc, hdc, sc).muchas gracias saludos desde chiaoas
No matter what colors you use this poinsettia tuts out beautiful
Turns out
I’ve made many many of these the very best pattern to follow and they are beautiful when finished Tina Barriga
Post a Comment