Saturday, December 29, 2012

A Crochet Christmas

There was a LOT of handmade stuff going on at our family Christmas this year and MUCH of it was crochet!  There were also a lot of really cool DIGITAL gifts.  I've posted about it on my other blog HERE.

Are you ready for the big reveal?


These little crocheted cork toys are so cute!  I got the idea off of Pinterest.  Do you follow me there?  If not, click here and choose follow.

I got the idea for the Cork Warriors HERE.  And you can click HERE for the gnome babies.

Next up:

 
I used THIS BUNTING TUTORIAL but I made the triangles bigger by continuing in the same pattern for several more rows.  I also outlined each triangle in white with single crochet and added letters hand cut from felt and attached to the bunting with a very strong fabric glue.  I also stiffened the buntings with a product called StiffNQuick.
 
And there's more (yes, I was very busy making - and I was loving every minute of it!):


I began this stool cover using a pattern from Made in K-Town. Here is the link to the pattern post.  I started with the spring mandala and when I ran out of pattern, I just continued it on my own, making up stitches as I went until the stool was an appropriate size.  To make the stool "tuck under" and stay on the top, I decreased a few stitches in eachof the last 3 or 4 rows until I could just squeeze the cover over the stool seat.  After that, it just stayed on tight on it's own.

Not done yet...

 
I made two pillows for my daughter.  Each side of each pillow is a different pattern so she won't get bored with them.  I didn't write down the patterns because I was kind of making it up as I went along.  The pillow on the left is done in linen stitch in rows.  It's basically sc, ch 1, sk 1, sc, repeat and then the next row, sc in the ch 1 space and ch 1 over the previous row's sc.  There are a lot of links on the web for how to do linen stitch.  The pillow on the right is basic granny squares in a join as you go method.  I used the join as you go by Lucy at Attic24.  If you crochet - I'm sure you know her but here is the link to her process.

Here is another page showing the flip side of the pillows:

 
The back side has a patchwork chevron pattern - more work than it was worth.  I actually made triangles and sewed them together to create the chevron pattern the way you would a quilt - then I did big cross stitches to highlight between the rows.  The other pillow back is a variation on the linen stitch using 2dc instead of 1sc, but performing a similar pattern.  The pillows are totally crocheted closed, so they aren't removable without cutting the joining row of crochet to take the two sides apart.
 
Still not done (in fact there will be some crochet projects I can't show you because I forgot to photograph them both before and during Christmas!):


I was REALLY pleased with the way these hats and scarves came out.  There are two sets and one set was made for each of my college boys.  In the photo shown, they have switched their crocheted items.  They each gave one another a tee shirt representing their college, so they thought it would be funny to switch the gifts I made for the photo.
 
The hat on the right is called the brain waves hat and it was an AWESOME pattern and free too.  In fact the designer has other patterns I really liked as well.  I found the pattern on Ravelry.  Here is the link.
 
For the scarf on the right - the wavy one, I started out making THIS PATTERN (also from Ravelry and FREE) but after a few rows, I went on and did my own thing which worked out quite well... I added some fringe before I ran out of yarn.  I believe that yarn was a wool/acrylic blend that I picked up at JoAnns.
 
For the hat on the right I played around with two patterns and kind of combined them.  They were also both from Ravelry.  ONE is here and THE OTHER is here.  Of course, I didn't write down any of my variations as I had a lot of gifts to make and I was kind of taking it as it went.
 
Here is another shot of me modeling the items on the left:
 
 
Yet more!
 
 
This scarf for my sister was a great pattern.  I used this pattern to teach my beginning crocheters at the adult school course I taught this past fall.  She looks really cute in the pink.  Here is the link to the pink scarf pattern.
 
Here I am modeling the pink scarf since the photos I took of my sister were a bit blurry -


This Christmas, everyone got into the crochet action and here are some things my daughter crocheted and gave as gifts:
 
 
My daughter Sydney crocheted the scarf for Anna and made up the scarf pattern herself.
 
 
The crayon melt pictures are all over pinterest, but adding the crocheted touches was my daughter's idea.  Aren't these awesome?  And she managed to make these gifts while working two jobs and attending grad school.
 
A few final Christmas crochet items from me:
 
 
My aunt got a book mark (they are easy to mail).  I sent her the ripple one.  For the ripple bookmark, I used the ripple blanket pattern by Lucy at Attic24.  Get that HERE.
 
The granny square bookmarks are ones I just made up - one went to my daughter and another went to my German daughter (Katrin, who lived with us as an exchange student). 
 
The striped scarf bookmark went to my 6 year old nephew, Quinn, who is currently reading the Harry Potter series.  I thought it looked like a Gryffindor scarf!  I didn't use any pattern for that - it's just single crochet for 3 rows and then switch colors.  I did sc around the entire outside edge and added fringe to one edge however.
 
Finally, if you remember a few weeks before Christmas - I gave a little sneak peek of my holiday wreath.  Well, I haven't written up all the patterns but most of them I either found on pinterest and can be accessed through this pinterest board or I found photos of and figured out the patterns on my own - and again, I was so busy and rushed I didn't write them down - but many of the patterns were very cute so I may want to make them again - and in that case, I will record what I do!  The teeny tiny stars as well as the holly and red berries are again from Lucy at Attic24. You may be familiar with my other crochet wreaths in this series... I made a summer wreath and blogged about it here (which I entitled spring wreath but eventually felt it was more summery) and also a fall/autumn wreath which I simply LOVE! 
 
Here are the closer up and also the final results from my Christmas themed crochet wreath.


So I hope you liked my little walk down crochet lane at my Christmas house!  Did you notice that my photos of the crochet projects are digitally scrapbooked?  Did you also notice the beautiful Nordic papers that I used?  You can purchase the digital nordic artwork for use with my awesome Creative Memories Storybook Creator software package HERE or you can purchase universal Nordic digital art for use with photoshop or other digital scrapbook packages.  Happy Hooking for the Holidays!  Sher

Wednesday, December 26, 2012

Friday, December 14, 2012

Thrift Store Score - teeny tiny ornaments

I LOOOOOOOOOOOOOVE the thrift store.  Basically I hate shopping - I mean HATE it.  However, I'm okay when it comes to thrift stores.  The other day when I was dropping off some donations for an organizing client, I perused the holiday bricAbrac.  Among the mess of red and green was a little plastic bag with tiny little treasures inside.


My heart went skippy but I didn't unzip the bag - I just popped out $3 and bought the lot.

WOW!  YAY!  OMG - sooooooooo cute.


I am simply THRILLED with the score.


I have loads of ideas about what to do with them that I'm sure I'll be putting into action quite sure with the help of my very handy husband.

The bag was loaded with teeny tiny ornaments.  Most of them were in great shape.  Some appear to be quite of the vintage nature, made of wood and painted with the cutest little facial decor.  They are so cute and old fashioned.  I couldn't believe my luck.


There are some newer ornaments, a bit more plastic-y looking but super cute.


AND there was a really adorable matryoshka.


As an added bonus there are three packs of mini ornament hooks that I know will come in handy.


Don't you just love it when $3 can make you so holiday happy?

Stay tuned for how I choose to display them...

Thursday, December 13, 2012

Christmas Crochet Wreath - teaser!

I've been making and making and making.  I've been crocheting stitch after stitch after stitch... a lot of it I cannot show you until AFTER Christmas, but I can share this holiday wreath.  It's the third in my serious of crocheted wreaths and it won't be the last.

I will have more instructions and pattern info coming, but I wanted to give you a little peek at what's to come.


STAY TUNED!

Tuesday, November 13, 2012

Spaghetti Squash Marinara - a one pan pie!

So a couple of nights ago I showed you a photo of some spaghetti squash cooking in the oven.

I promised a reciepe for the yumminess that was to be our dinner.  Well, here it is:


The recipe is fast, easy and delicious - and if you've ever perused your local farmers market and seen spaghetti squash and not known what to do with it, try this!

First.   To cook the squash, I bake it, but it can also be microwaved.  It can be cooked whole, in halves or in pieces.  These babies are really hard to cut into uncooked, so be careful.  You can poke a few knife slits into them and microwave them a bit to make them easier to halve.  I trudged through with my ginsu knife and cut mine in half.  Then, I removed the seeds and loose pulp and drizzled their insides with a bit of olive oil and also rub a tad bit of oil on the outside as well.  Place them inside-down on a cookie sheet or baking pan and set the oven to 375F.  I bake them for about 45 mins, less time with smaller squash.  To test if they are done, turn them over and poke them with a fork, they should be quite soft and seem scoopable.


Once the squash are cooked, brush a cast iron skillet with olive oil (I'm sure this would work in a quiche pan, pie pan, or other casserole dish).  You will build the entire meal in this one pan.  You will also bake it in this container, so make sure the container can bake (I guess it would cook in a microwave as well, but I liked the oven).

Scrape the spaghetti squash from it's shell.  As you scrape with a fork, the squash sort of shreds into pasta-looking pieces. 


Fill the bottom of the pan/dish with the shredded squash.
 
 
Next, layer on your favorite spaghetti squash.  I think this time I was using a jar of organic marinara sauce.  Sometimes I make my own sauce, sometimes I use organic store made.  It doesn't matter, you can also use any sauce with additional ingredients like garlic, mushrooms, etc..

Next, a layer of mozerella cheese, just like a pizza!


Now - the first layer is done, but don't stop there - another layer of squash, more marinara...


Top it off with cheese.  I threw on a handful of  fresh chopped italian parsely, a dusting of parmesean cheese, salt, pepper a bit of granulated garlic and a dash of crushed red pepper.


OK - ready for the oven.  I baked it at 350F for about 30 mins, long enough so that the top slightly browned, the cheese was well melted and tiny little bubbly action was happening around the rim of the pan.
 
 
I let mine sit for about 5 minutes to firm up just a bit.  Then I sliced it with a knife into pie shaped sections and scooped a piece of pie onto each plate! 
 
 
It was SUPER delicious.   And one great thing about this dish - left overs!!!  The extra pie slices store and heat up rather nicely for a warming lunch later in the week.
 
Today, it's a bit cold around here...about 50F degrees but a rainy, chill to the day.  A few hours ago when I was getting geared up for my running group, I psyched myself up for a jaunt in the rain by promising myself a warming plate of heated spaghetti pie marinara when I returned home.
 
Now don't get me wrong - if you know me, you also know I LOVE to run in the rain.  So I got appropriately geared up... and now it's time for lunch!
 
Along came my gore tex jacket (which I didn't end up wearing), my favorite rain avoidance running hat and a nice bright red shirt so cars could see me.  And, of course, my beloved Smartwool running socks that I never leave home without!


I hope it was a good day where you are and if it's a little chilly and rainy, here's hoping you had a nice warm lunch!
 
I finished a crochet scarf... photos and ta dah to come.  Sher


Sunday, November 11, 2012

Fall Weather Glory

So, we've had a hurricane (tho. the worst of it passed my neighborhood right on by), last week I shopped at the Farmer's Market in the SNOW,


and today it's a balmy 60F degrees.  Who can figure?  At least the weather is nicer for all of the folks just north and east of here in NY and NJ who continue to dig out of the mess left in the wake of Hurricane Sandy.

Our town packed up two 18-wheelers full of donated cleaning supplies, paper goods, clothing, etc... and drove it up to Staten Island this weekend.  WAY TO GO!  There was a big collection at all of the polling places for the goods so it couldn't have been easier to make a donation.

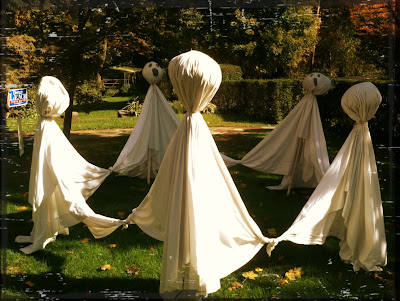
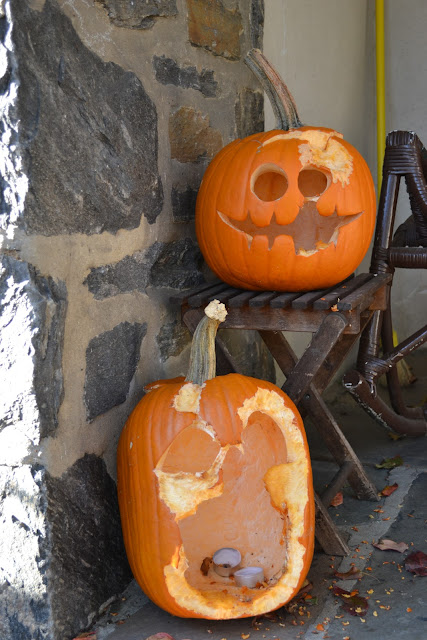
By the time Halloween came around, most of the people in my town who had lost power had gotten it back.  We never lost power or cable at all - so I guiltily did not have to endure any hardships from the storm or it's aftermath.  It was trick-or-treating and Jack-O-Lantern making as usual in my neck of the woods.


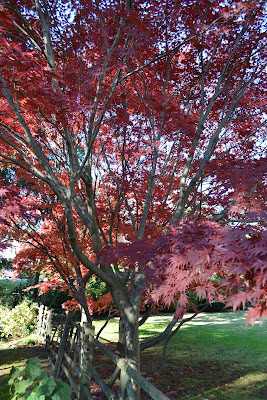
The trees were heavy with their leaves when the hurricane passed thru and amazingly, they didn't all blow off in the high winds.  SO, our trees are finally showing their beautiful array of colors.  By the time election day came around, I had a lovely fall run to the voting booths and now that's come and gone as well.


My hubby dismantled the last of the dried out garden yesterday


and raked a bunch of leaves into piles to cover the garden soils. 


It's so warm today that he can mow the lawn in just a tee shirt!  The squirrels are getting their fill of my left over pumpkins.


I got out a little bit ago with my camera and attempted to capture some of the beautiful leaf color in my yard ...


and a few snaps of our happy dog, racing around in the unseasonal temperatures.


I decided it was a good day for a little chocolate goodness and threw together our family's favorite no bake recipe for a treat. 


We call them Rockin' Robins but I'm sure they have plenty of other names.  They are super easy and fast to make and have a very short list of ingredients - here goes:

4 T peanut butter, 1/4 c milk (or milk substitute if you're vegan or dairy allergic), 1T of cocoa powder, 1 C of pure cane sugar, 1-1/2 C of rolled oats, 1t pure vanilla

Melt the peanut butter, milk, cocoa and sugar in a pot on the stovetop over low head until well blended and until the sugar is mostly dissolved (it takes only about 5 mins and shouldn't boil or even simmer).  Turn off heat and add oats and vanilla.  Stir until oats are coated with mixture.  Spoon onto waxed paper covered cookie sheet.  Let sit at room temperature until hardened or put into fridge for faster firming up. 


THEN...EAT!  Yum - delish.


I've also got some spaghetti squash baking up in the oven for a yummy dinner tonight - I'll share that recipe tomorrow!


A last few gazes out the kitchen windows before the sun begins to set!


Hope the fall weather is lovely where you are - Sher
Related Posts Plugin for WordPress, Blogger...