Showing posts with label Bunting. Show all posts

Wednesday, December 31, 2014

Creatively Christmas 2014

While I haven't been blogging...
I HAVE been making.

Much of my making was Christmas gifts.  However, I have a bunch of patterns to share for things I've created and projects I'm in the midst of.  So if I keep on blogging you will have that to come...

Here are some snippets of our Christmas:


One of my favorite moments is on Christmas Eve when most everyone has gone off to bed and only the indoor Christmas lights brighten the room.  Under the tree is loaded with gifts.  It's very quiet, it's totally serene.  I have to stop myself from taking photos to try to make that special time hold still...


Once the morning arrives and the crazy kids awake (4 of these kids are mine, 2 are my sisters and the one at the top of the steps is my youngest sister who is 20 years my junior - so she is lucky enough to get to be part of the batch of kids yet), the Christmas crazy begins.


For the past several years it's been my goal to use all non-traditional wrappings.  My attempt is to use no paper wrapping at all.  Most of my wrap gets re-used from year to year.  In these photos of the wrapped gifts you can see a variety of wrappings: old clothing, sweaters, pant legs, shirts, skirts etc... made into wrap bags and tied with re-usable ribbons.  Only the handmade paper gift tags get tossed.  Also in the mix is mailing envelopes (you can see one on the far right with a tree drawn on it), handled shopping bags (which are then given as part of the gift), flannel backed and plastic table cloths (which I buy at the dollar store and re-use year after year - works great for bigger gifts), paper grocery bags, the paper and bubblewrap that comes in the shipping boxes from amazon, etc.... Once a gift is open the family returns the clothing bags, ribbons, etc... and I store them in a box to re-use the following year.


For my little niece Maisie, my husband and I co-created doll beds and bedding.  Maisie has three dolls (handed down from her mom, my sister).  There is a blond, brunette and red-head doll.  My husband fashioned them beds that stack in bunks or come apart as separate.


We trash pick wood and re-use old furniture quite a bit.  My husband probably didn't buy anything new to create these beds - he fashioned them all from the odd bits of wood and molding strips already in his garage.

Likewise - I did my part to dress the beds.  After all, these dollies needed a bit of soft and warm for proper sleeping:


Each doll bed had entirely handmade bedding (by me).

An old ikea curtain provided the means to sew hand-tufted mattresses stuffed with leftover couch pillow stuffing.  Atop the mattress was a double-sided flat sheet (easy for a toddler to make up the bed).  Once the doll was on the sheet she'd need a place to rest her head so I sewed a pillow and a coordinating pillow case (to match the sheet and other bedding).  Most of the sheets and pillow cases were made from thrifted vintage sheets.  Atop the doll were then a quilt and a blanket.  The quilts were all handmade (sewing machine made) by me.  Each quilt had a traditional pieced side and a more modern side.  Then, each doll received a crocheted blanket.  There were three total bedding sets, one each with a pink, orange and green theme.  My sewing machine was in the shop for 6 weeks before Christmas and I just barely got it back in time to complete the bed sewing.  WHEW!

I hope Maisie will love the doll items for years to come.

And then there were the hats.  My daughter got 4 (because I like to make hats in front of the TV while watching sappy Hallmark Christmas shows)!  The first one is slouchy and kinda Rasta in an acrylic-cotton blend.


Then there was the acrylic-wool blend purple and turquoise slouchy.  I should have photographed all the hats before giving them so you could see the actual hat other than just seeing it perched on a head with all the detail missing.

 
 This one was again, wool acrylic with a  very chunky yarn and a pattern I got from Moogly blog. Consequently - the white hat was my personal favorite and I might make one for myself.


This final hat was a beret with a pom pom - of course which you cannot see!  It's made from 100% Peruvian wool in a double green/blue twist.


Finally, I winged one final hat - in royal blue with red and white accents in my son's college colors.


It's an unwritten tradition to wear everything you get on xmas morning - so my son has a bow tie, a football jersey and a crochet hat all together.


An annual tradition is for each kid to have a crochet college bunting to hang in the dorm room.  This one is for the son on the left to hang at his college, Shippensburg, and has two little ships wheels included (I made up that ship wheel pattern and will share it).  I also used the capital letters pattern from moogly blog.  Do you love that blog? It's one of my favorites!
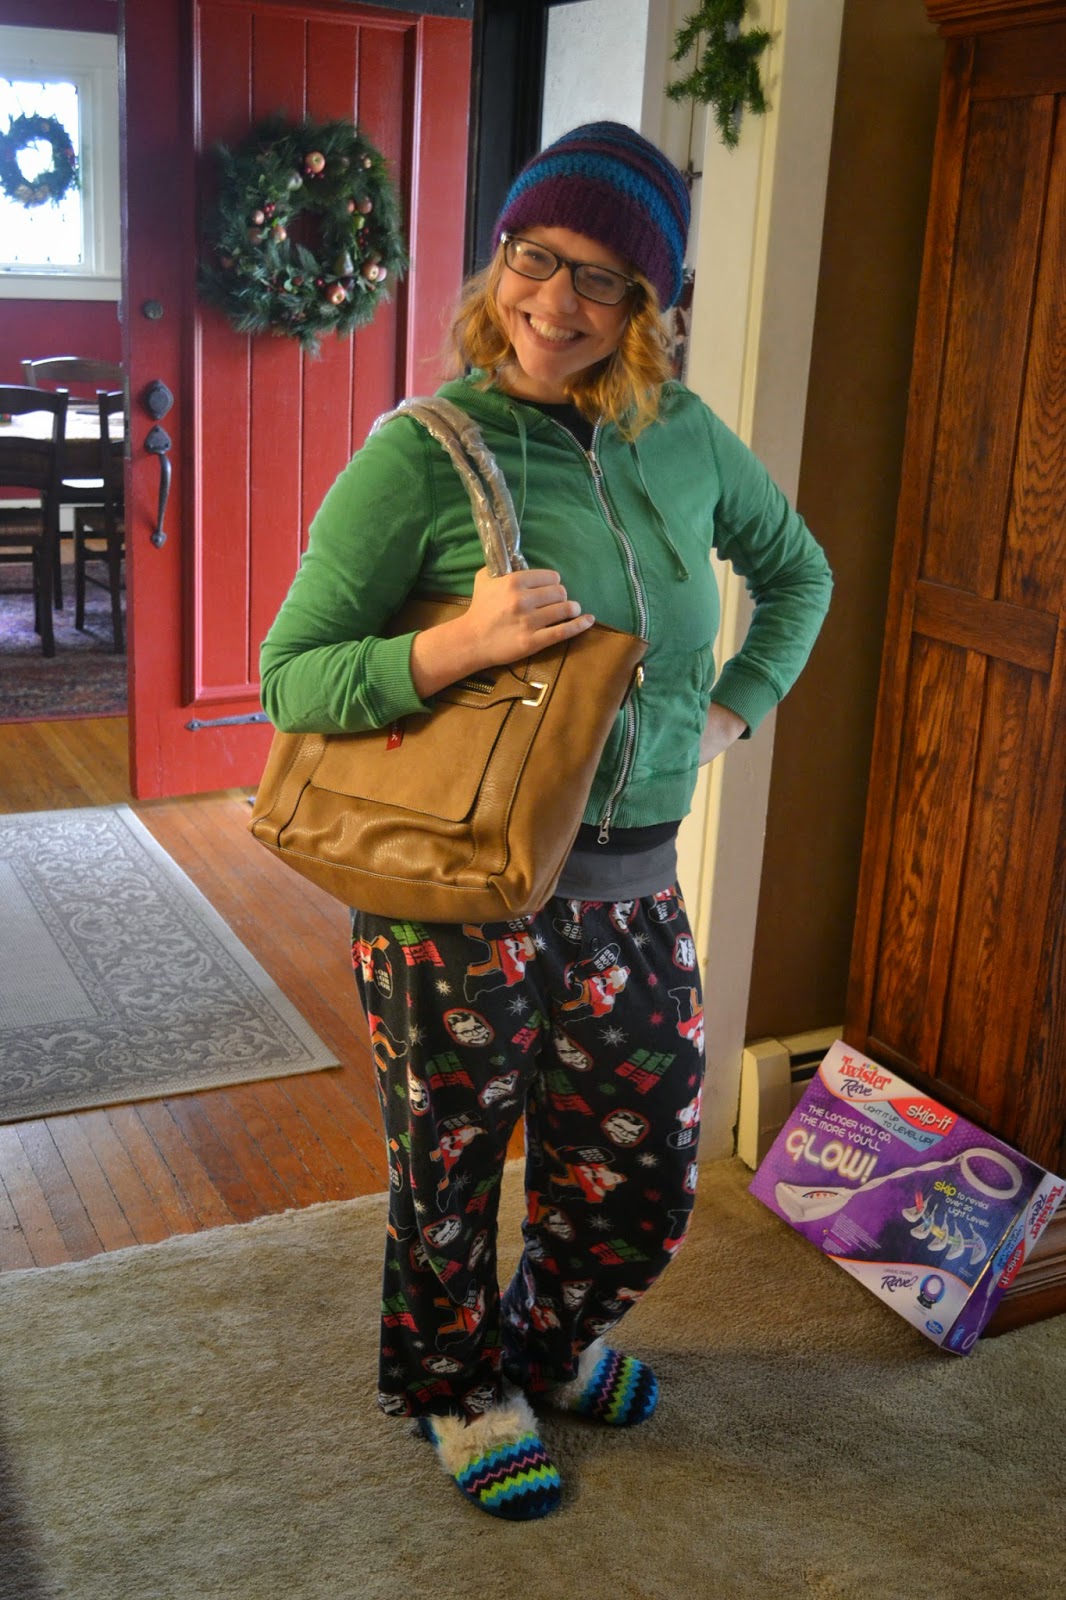

Remember what I said about wearing everything you get - take a crazy pj outfit and start adding hats and purses and OH MY!


In a house full of teenagers and twenty-somethings - this group gift was a HUGE big hit and they cheered for about 5 straight minutes.  The gift was a card game called "Cards Against Humanity" which is a very inappropriate version of Apples to Apples.  They have been wanting this crazy and very non-PC card game for a while.  Yes it got played that night - and I and my hubby joined in.  It's very inappropriately funny - but those of you with high morals or young kids would be abashed (I have neither the high morals or the young kids).


A few years back I suggested that the Christmas dinner meal be a casual one.  Since everyone stays at my home for several days before and after Christmas, things are a bit hectic... I figured an easy meal would help with the strain and stress of heavy cooking duties and it does.  Here is our Christmas table in which everyone dresses as he or she pleases, pjs are welcome.  We have 3 pots of soup (2 vegan since most of the family is vegan, and 1 organic but not vegan).  This year we had vegan veggie, vegan creamy broccoli and organic chicken noodle.  Typically I also provide a salad and this year it had arugula, baby kale, baby chard, baby romaine, baby spinach, organic tri-color quinoa, heirloom rainbow cherry tomatoes, roasted yam, dried cranberry, homemade sweet and salty pecans and balsamic dressing.  Often there is homemade bread but this time we had a few organic store-bought.  One whole grain and one with rosemary.  A big pitcher or pomegranate iced tea, some alcoholic beverages and the meal was a done deal.  I don't have fancy dishes enough for everyone, so each third of the table had their own dishes pattern. 

Around mid-day we had eaten some hearty appetizers: peppered salami and sharp cheese for the non-vegans and all the rest was vegan: hot salsa with chips, bread with spinach artichoke dip, anti-pasta salad with olives, peppers, artichokes and mushrooms, roasted veggies with cauliflower, carrots, onions and zucchini, tapenade with crackers, hummus, salted nuts... and a variety of other things that kept us fully satisfied with simple to serve type food.

 And a big bonus this Christmas for me?  I got to sleep in a bedroom and in a bed while the guests were here!!!!  Usually I have to give up my bed and my bedroom and I end up sleeping on a couch or a floor (as does my hubby).  But this year we re-did the "boys" room that was rather teenage boyish and yucky and turned it into a bedroom that we could offer to a guest. SO I then got to sleep in an actual bed in my own room.  And that was Christmas bliss.

I love to make and to give gifts at Christmas.  I don't as much like getting gifts.  However, my hubby gave me two bottles of wine, two yummy little boxes of chocolate and two new indoor scarves... all good stuff!

How was your Christmas?  What are your traditions?  Do you celebrate another holiday or a different religion?  If so, what do you do on Christmas when others are celebrating with lighted trees and holiday wrapping?

Next up - all the making and creating that's been happening for the past 6 months... to include some new free patterns for you!  TA TA and Happy New Year's Eve!  Sher

Tuesday, June 17, 2014

Triangle Bunting Tutorial

I know, I haven't caught you up yet with lots of things I promised to relate.  But, I thought you might like a new little photo tutorial first.


Even though there are many things I should have been doing instead, the urge to create something entirely new, an original triangle for a new bunting, I simply had to make this happy little bunting instead.  Of COURSE I had to share it with you - so enjoy.


Oh - and I made two - so if  you are more of a bluesy person rather than a multi-color person, maybe this inspires you.

For this project, I reached up to my stash of Sugar&Cream and Peaches & Cream worsted weight cotton and whatever balls or yarn fell down on my head are the ones I used - no lie.

This project used a size 7 - 4.5mm crochet hook.


So that's it.  I don't write patterns well.  So, I use a lot of photos to show and explain.  One day, I will learn to write a diagram.  I think this would be an easy pattern for trying a diagram.  I try to make the photos close up so that you can see the stitches.

This pattern uses American crochet terms.

So now go and make yourself a little bunting.  How happy you feel.


Enjoy!  Sher

Saturday, February 8, 2014

Valentine Trimmings

Above the fireplace, I decorated the mantel to be more in line with Valentine's Day.  Hubby hates it when the Christmas decorations leave the house looking bare and longs for some festive décor.  For me, it makes a fabulous excuse for filling the house with crochet and flowers~


Makes me want to run upstairs and crochet more stuff with hearts!

Wednesday, February 5, 2014

Chocolate Heart House Bunting


Did you see my Happy Heart House Bunting?  Well, here's another take on that.  It was inspired by Valentine's Day chocolate.


and also inspired by a little Gingerbread crochet house that I found when I was looking for a way to add snow to the roof of my happy heart house bunting.  In the gingerbread inspiration house, Ursula makes an ornament.  It's single thickness and doesn't have the final edging of single crochets around the outside that mine does.  She also uses a different pattern to make the little red heart on the front of hers.  But, nonetheless great minds think alike, right? I've made my chocolate bunting the same size as hers as we both came up with basically the same house pattern and I liked the size of her gingerbread version.

I'm calling mine:  Chocolate Heart House Bunting and it's a baby version of the "Happy" one.  I've made a photo tutorial and also have typed up the pattern so you can follow it exactly as I made mine if you so choose.  Here goes:

This pattern uses American Crochet Terms
Yarn used: Knit Picks Dishie 100% cotton yarn (light worsted/~dk); size G/6 - 4.25mm hook
also white carpet warp and a size C crochet hook

Row 1: To begin, make a slip knot and chain 9, turn.

Row 2: sc in each stitch (8 stitches), ch 1, turn.

Row 3 - 8; Repeat Row 2.


Row 9: sc2tog, 4sc, sc2tog, ch1, turn.

Row 10: sc2tog, 2sc, sc2tog, ch1, turn.

Row 11: sc2tog twice, ch 1, turn.


The basic house is now constructed.  Next, single crochet around the outside edge.

Starting at the top of the roof and continuing down the left slope of the roof, make 1 sc in each stitch.  Make 2sc into the same stitch at the place where the roof meets the house and 3sc into the same stitch at each bottom corner of the house.


Make 2sc into the roof tip and finish off at the top of the house.

GREAT!  Now make a second house the same way.  Each bunting house requires two of these.

My bunting has 5 houses, so 10 house sides are needed.

Now, onto the heart.  I made all of my hearts in light pink.  I used this pattern here:

SALT for the spirit: Itty bitty crochet heart tutorial

For my bunting I needed 5 hearts.  Stitch the heart to the right side of 5 house parts.  The back doesn't need to look neat because it won't show.


Once the houses and hearts are complete and the hearts are sewn on, it's time to join the two house parts.  Put two house parts wrong sides together and tuck in any yarn tails.  They fit nicely right inside, no need to even clip them.


Single crochet the two house sides together.  Again, put 2sc into the stitch where the roof meets the house, 3sc into the stitch at the bottom corners of the house and make a (sc, ch3, sc) into the very tip of the house so that there is a bit of a loop at the top of the house - the loop is what you will use when you connect the houses to form a bunting.


Let's add the snow (tho. today, where I live, this would definitely be a layer of ICE on the roof - oh my the weather we are having here!  take a look at THIS POST to see photos).

To add the "ice" to the roof, I switched to a C sized hook and a very thin white cotton.  Poke the hook into the stitch just below the final edging and pull a loop of white thread thru.  Yarn over and pull through to attach the white.  Now, single crochet, ch 1, single crochet up one side of the roof top and down the other.  It did the stitching by starting on the right side of the roof just below where it meets the house, the right side is facing me.


When you get the to top of the house, stitch the white ice in front of the loop as you see in the photo below.

Next, weave in any remaining tails and get ready to join the houses.


I used the same pink yarn as the hearts to connect the bunting.

Make a slip knot and chain 15.  Slip stitch into the first chain to form a hanging loop.  Chain another 15, put the hook through the top loop of the first house.  Make 3sc into the roof top loop.  Chain 15 between each house and the next house.  Make 3sc into the top loop of each house.  After all the houses are attached, chain 30 and then slip stitch into the 15th chain from the hook to form the final hanging loop.  Weave in the ends of the bunting connector and TA DAH - find a lovely place to hang it up and enjoy it for Valentine's Day.

Remember, this is way more low calorie than the actual chocolate candy!


Saturday, January 18, 2014

Happy Heart House Bunting TA DAH!

A bit before Christmas, I had the idea for a holiday house bunting (hopefully it is an idea that will remain in my brain and be created for another Christmas).  HOWEVER, this year it never came to be.  The idea was still in my head when the holidays were over, and the designs I had played around with a few months ago were still pushing themselves at me and begging for creation with a hook and yarn.


So, I devised a heart house bunting for Valentine's Day.

I had first created a cute little house for my bunting a few months back.  I was happy with my pattern and so, that part of the bunting I kept.  Because it's typically cold and sometimes snowy here in the northeast USA around Valentine's Day, I searched around the internet for inspiration to add a snowy rooftop to my little house.  (More about that find - later)

I also wanted LOVE to join in with my house bunting.  A house full of love for Valentine's Day?  A little snowy house full of love with a fire going inside?  A yarny love house with a warm fire and snuggly blankets inside...yes, yes and yes.  These are the inspirations that my Valentine's bunting would portray.

So I got to work, trial and error, and what happened is my Happy Heart House Bunting!

I'm super pleased with it.  And of course, I must share the pattern with you so that you can make one too! Here goes the photo tutorial (American Crochet Terms):

Supplies:

I used Knit Picks Dishie yarn (one of my faves).  It's 100% cotton and a light worsted weight.  It comes in a decent variety of colors.  I order it online and use it often.  For this project, I chose a size G - 4.25mm hook, tho. this size is less common than the size G - 4.00mm hook (either will work fine).

The first items to create are the houses themselves.  You will make two houses from each color.  My bunting has 5 houses (it could easily have more or fewer).  I'll start with the orange house.


Foundation Row: Chain 13, turn. (12 ch plus 1 turning ch)

Row 1: sc in each stitch across, ch 1 turn (12 stitches)


Row 2 thru 10:  Repeat row 1.

At this point you have 10 rows of 12 sc each

I photographed this over a few very cloudy days - photo colors vary, sorry.
Now for the roof.  You will begin and end each row with a decrease until you reach the roof point.

Row 11:  sc2tog, 8sc, sc2tog, ch1, turn
Row 12:  sc2tog, 6sc, sc2tog, ch1, turn
Row 13:  sc2tog, 4sc, sc2tog, ch1, turn
Row 14:  sc2tog, 2sc, sc2tog, ch1, turn
Row 15:  sc2tog twice, ch1, turn


You have now built one house side, but you will put a sc border on it to smooth it off.

Starting with the last stitch you made, and continuing down the left side of the roof (front side is facing), sc in each stitch around.

When you get to the stitch where the roof joins the house, make 2sc in that stitch


When you get to the bottom corner of the house along the bottom, make 3sc in each corner.


When you get back up to the top of the roof, make 2 additional sc right there at the roof peak (where you made your first border stitch).


slip stitch into the next stitch and finish off.

Now, using the same color yarn, make a second house just like the first.  GREAT!

Continue on, making two houses from each color until you have as many houses as you plan to add to your bunting.


As you can see in the photo above, I have only one more orange house to create!

Once you have completed your house, it's time to make a heart for each house.  I made 5 red hearts - one for each house.  You could of course make any color heart or make lots of different color hearts depending on the look you want for your bunting.


I used a heart pattern from Maggie's Crochet Blog I got permission from Maggie to link to her heart pattern here. (the pattern may appear to be unavailable but it's not, just scroll down for the directions).  I have an entire pinterest board of crochet heart patterns.  Maggie's is on that board as well.  I like the Maggie's heart pattern because it was very simple and made in two rounds.  I used a magic ring when I started my heart, Maggie's pattern calls for a ch4 with a sl st join to begin.  Either method works fine.

Remember to leave 1 or 2 long tails on your heart.  You will use the tails to sew the heart onto your house.

While I was rummaging around for a pair of scissors in one of my drawers, I came across a little package of heart buttons.  I ended up stitching a button onto the front of each heart as well.  You can add a heart button embellishment or skip that step - up to you!  If you add the button, stitch it on BEFORE you go on to the next step of joining the two sides of the house.

No need to make it look pretty on the back, this will all be hidden.
Once you stitch on the heart, the button would go next.
Once the heart (and button) are attached, you will join the two houses.

Line up the houses with their wrong sides together.  Then, starting with the heart house facing you, join the two houses together using a single crochet.  I started just to the right of the heart on the right hand side of the house.

Make 2sc in the same stitch where the house joins the roof.

At the roof peak, sc in the topmost stitch, then, ch3, then sc in the same stitch again.

Continue down the left slope of the roof, make 2sc in the same stitch where the house joins the roof.

Continue down towards the bottom of the house and make 2sc in the same stitch at each bottom corner.

Continue around to the place where you started joining and slip stitch into the first stitch made, finish off, weave in ends.


Repeat the same steps to join the two sides of each house.

Next - let's add some snow to the roofline!

Using the same hook and some white yarn, push the crochet hook into the house into the stitch just below the joining row you made (see photo).  Do this about 1 or 2 stitches below the point where the house joins the roof.


Pull a loop through.


Make a single crochet that goes over the entire join row you made.


You want about 11 sc stitches from your starting spot to the peak of the house (count back down from the house peak towards the house side to see where to begin - if you prefer to make 12 stitches on each side, that can work as well).


Note that where the arrow is shown in the photo above, I crocheted the white sc in front of the 3ch loop at the top of the house.

This first row of white is what will hold our little piles of snow onto the top of the house.

Ch1, turn.  Peform the following stitches going up the left side of the house towards the peak and back down the right side (the opposite direction of how you just put the first white row on).  Yes, the back of the house will be facing you while you make the snow piles.


In the diagram above, you will see the back of the house.  The little white ovals represent the sc stitches you made with the white yarn.  The black text along the slopes indicates what stitches are to be made in each of the sc you made in the previous row.

The starting point is indicated.  The starting point is where you ended the first white row and did a ch1, turn.  You are ready to begin the stitches listed in black.  I hope you can understand the diagram.  I am a very visual learner and I felt the written explanation would be too lengthy and confusing.  If you have any questions about this part, contact me.


Here is the blue house with the snow piles on the roof.  Keep in mind that it was just after I made this house that I decided to add the heart buttons to the bunting so I had to sew the button on this house after it was already joined.  You should not sew on the button after joining.  The rest of the photos show the button sewn on at the correct time.

Now that you've finished adding snow to your first house, you will want to continue adding snow to all of your houses.  Here are some photos of adding snow to the yellow house to assist you if the photos above don't do the trick.


Keep working (get a nice cup of coffee or tea to get you through) until you have added snow to every house.


Now - get up and do a little happy dance!  You are nearly finished with the bunting except for the joining together so this deserves a bit of celebration.  Here you see the snow on the houses from the back sides.


Most assuredly, you will want to arrange your houses in lots of little configurations and take loads of photos just to please yourself - and you would be right by doing so!


Lovely - happy - fabulous!

Okay, now before you get too over the top with your accomplishments, you need to attach the houses together to form a little bunting.  This process is very easy and painless and it really takes very little time.

First - decide the order your houses will go in.  Then, note that with the house fronts facing you, you will join the houses right to left.  So if this were to be my final order, I would first join the orange house.  This is not the case with my bunting - in fact, this little configuration is exactly backwards from how my final bunting will look - no worries, I rearranged it before joining as you will see in the remaining photos.

Here goes the joining.

Using your joining yarn and the same size hook (I am using red) ch20.  Slip stitch in the first chain from the hook.  You have just formed a loop - this will be your hanging loop.

ch 30.  Now you will join your first house.

Pick up the first house (the house that will be all the way to the right side of your bunting).  With the house facing you (heart in front), make 3sc into the loop at the very top of the house (the loop was formed when joining the two houses).  See photos below.


A: ch 25.

B:  Make 3sc in top loop of next house.

Repeat A and B for each house that will be in your bunting.

When the last house is joined, chain 50.  Then, sl st in the 20th chain from hook to form the second hanging loop.  Weave in ends.  DONE!

Okay - another happy dance is in order, or a glass of something that will make you tipsy if you'd prefer.

Your Happy Heart House Bunting is complete and ready to hang it up in honor of Valentine's Day!  YIPPE.


Hope you enjoyed my bunting tutorial.  Let me know how you like it.  And, if you make one, feel free to share your photos on my ravelry page or in my facebook group.

Next up - in my search for rooftop snow, I uncovered the cutest little tiny version of my little house created by another crocheter.  So, I made a mini chocolate candy version of my heart house.  As soon as I get permission to link to her pattern, I will certainly add a photo tutorial for that adorable and yummy little Valentine's Day bunting as well - stay tuned! Cheers, Sher.

NOTE:  I made a similar bunting with a photo tutorial.  I'm calling it Chocolate Heart House Bunting and you can find the TUTORIAL HERE.


Related Posts Plugin for WordPress, Blogger...